|
1. “Comparison is the thief of joy” ~ Theodore Roosevelt 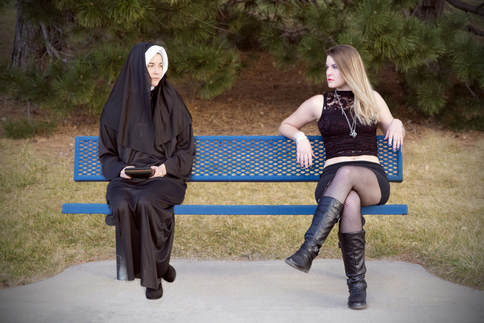 Be it final images, camera gear, or number of likes and subscribers, comparing yourself to others is a surefire way to destroy your love of photography. If you are anything like me you spend a fair amount of your time looking at images created by other photographers. It is a very slippery slope to start down once you start comparing your work to the myriad of images out there. There will always be photographers that are ‘worse’ than you as well as others that are ‘better’ than you. As hard as it may be, simply stop comparing your work to the work of others! Instead, if you run across an image that blows you away, use it as a guidepost as to where you want to be with your photography in the future or use the image as practice and to try and replicate it. If possible, reach out to the photographer and start a dialogue about the image. Turn the ‘competitor’ into a mentor. I can’t recall how many times I have done this and the outcome has always been positive. And if someone reaches out to you about your work, be gracious and take the time to discuss your work with them. Worry less about what others are doing and spend more time focusing on what you are doing. If you busy yourself trying to improve your own craft, you simply won’t have the time for comparisons. 2. Believing better or more expensive gear will automatically result in you being a better photographer or producing better images  Nothing can be more frustrating than purchasing new equipment expecting to get amazing results only to discover your images fall frustratingly short of your expectations. In addition to going broke, you’ll go broke with images that are generally the same quality as images you produced before the purchase. If you don’t understand how to properly use the new equipment, your images may actually turn out worse. A skilled photographer will always get better pictures from an average camera than an unskilled photographer will from the best equipment. If you buy new equipment, use the excitement of new equipment to get you up and shooting. It’s that increased practice of photography that will result in becoming a better photographer, not the new equipment in and of itself. The equipment is just a tool. Learn to use the tools you have and discover where the equipment might be failing your needs before getting new equipment, then start researching new equipment that might fill that need. Photography can be a very expensive hobby. Make each purchase mean something other than “it was on sale”. 3. Changing your style to please others  When most people pick up their first camera, it isn’t to try and please someone else. Most people grab their first camera because of the creative process behind the hobby. Most people start out taking pictures of things they enjoy. Never stop doing that! On occasion, you may need to change your style to please a client or two however doing this repeatedly will result in a loss of interest rather quickly. It doesn’t matter if you’re trying to garner more subscribers, followers, or likes, if you try and please the masses, photography will become less pleasurable and more like a job (and a job you begin to despise). Do what you like doing and continue taking pictures of subjects you find interesting and those that appreciate it will find you. 4. Finding yourself in a creative block or rut  There are simply times you lose personal satisfaction in what you are creating for no real apparent reason. This happens to all of us. Expect this to happen from time to time and you won’t be so discouraged when it does finally happen. You can either work through it or give up. If you give up, your gear will start to sit on the shelf for longer stretches of time collecting more and more dust. I find the best way to break out of a creative rut is to actually shoot more. Try digging up some of your very first images and attempt to recreate them again with your new set of skills. I force myself to engage in a photography project or idea even if I’m not feeling it. Others find taking a short break rejuvenates their passion. Whatever works best for you, don’t give up. The creative process will return eventually if you allow it to. 5. Trolls, haters, and negative comments  Once you put yourself out there on the internet and in the world of social media, you are bound to have those that simply enjoy tearing down and insulting your work. Such comments can often times make you reconsider posting your work or can even make you reconsider your passion altogether. Grow a thicker skin and march on! Think of it this way, your work caused someone to take the time to respond to it, even negatively. I once heard a statement to the effect that trolls are attracted to crowds of people and crowds of people are generally associated around great work. DO NOT respond back to trolls and haters, just delete or ignore their comments and take satisfaction in the fact they felt it necessary to react to your work. Let the haters hate. One day they may ask to work with you. It's happened to me. I have been engaged in photography for a while now and I cannot tell you how many people I have seen come into the art of photography that have since disappeared clean off the map. Perhaps some people were just dabbling in the hobby to see if they enjoyed it only to discover they didn’t but I’m sure a fair amount of them lost their interest because of one or two of the reasons stated above, if not all the reasons (or other reasons not listed above). If it’s not for you, by all means, find something that does speak to your creative side before spending way too much money. But if you are passionate about the art and any one of the reasons listed above has you hesitant about continuing, continue anyway. "Art, freedom, and creativity will change society faster than politics." ~ Victor Pinchuk.
1 Comment
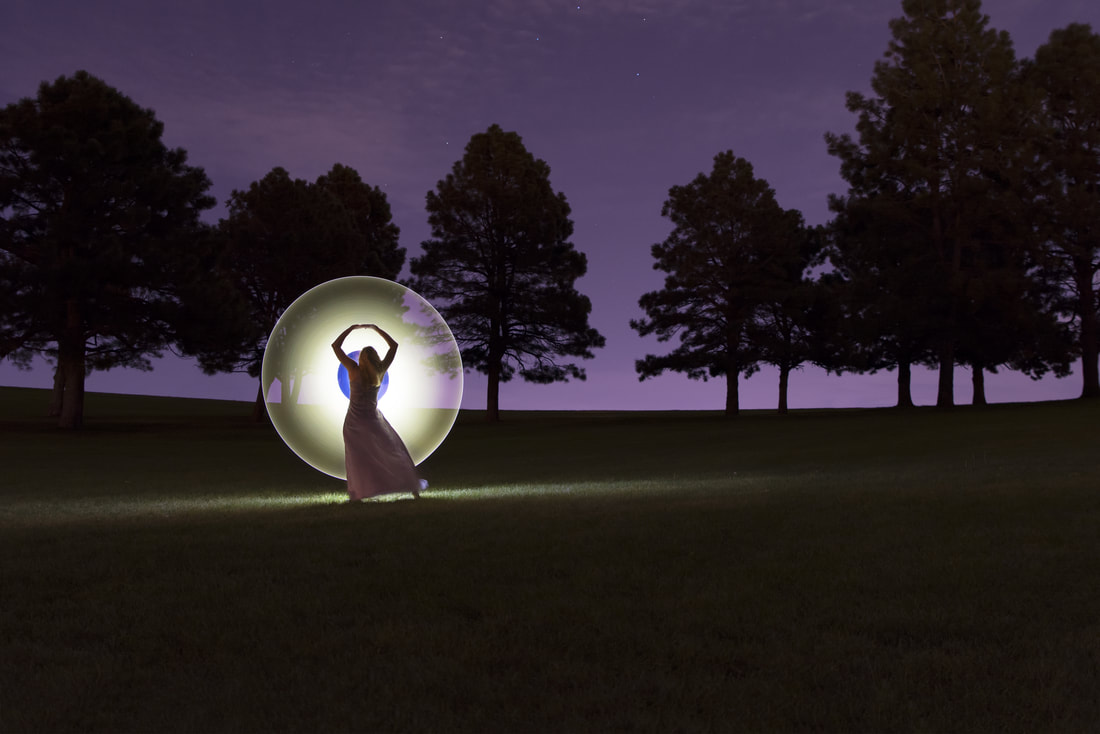
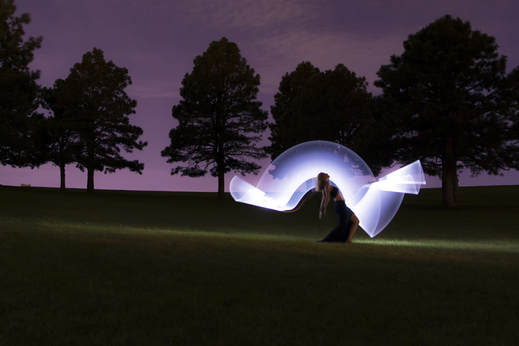
It’s amazing what you can do with a little light and a camera capable of taking long exposures. Well, maybe there is a little more to it than that, but not much. For photographers into light painting, ‘tube painting’ has become a bit of a trend lately. I originally ran across the idea of making illuminated circle behind models when I saw Wien-Jié Yang’s video several years ago. More recently, Eric Paré and his model Kim Henry have refined the process using very specific items to create amazing images. If you are not familiar with either of their work, please take a moment and check them out. Once I saw the resulting images, I had to give it a try.

In essence, you want to create a long tube of light you can move around your subject. By placing a flashlight at the end of a clear tube, you can create this effect. You will need a flashlight, T12 tubes, white tracing paper, and colored film for this shoot. For the flashlight, Eric Paré uses a very specific and bright flashlight for his work. The flashlight, however, isn’t cheap (~$70) and if you want a strobe effect in the resulting images, you’ll need at least two of them. Always trying to keep my shoots as cheap as possible, I simply modified one of my brighter flashlights instead of purchasing the more expensive flashlights. The T12 tubes are clear plastic tubes that are placed around T12 fluorescent light bulbs to protect them. These tubes also come in smaller sizes such as a T8. The tubes come in 4 and 8 foot lengths and can be found at most local hardware stores for about $4 and $8 respectively.
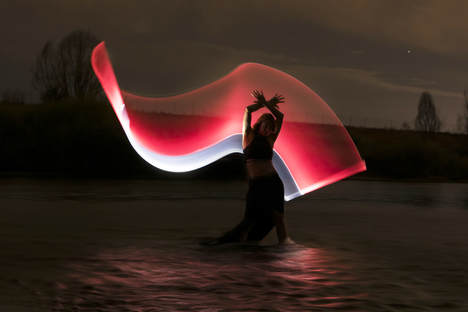
At this point if you simply place the flashlight in the tube and turn it on, the tube will not light up enough to be visible in camera. You need to find a way to disperse, diffract, and bounce the light around inside the tube to make it brighter. I experimented with sanding the outside of the tube to create more areas for the light to bounce and reflect through, but this process was not nearly as successful as simply putting a piece of white tracing paper inside the tube. The white paper really does help diffuse and spread the light more evenly throughout the tube. I then purchased several different colors of cellophane ‘basket wrap’ from a local hobby store and cut the cellophane to fit inside the tube as well. At first, I put the colored cellophane on the inside of paper but found it worked better putting the colored film on the outside of the paper. I also found if I doubled up the colored film, I could get more saturated colors. If you are lucky enough to find them, some T12 tubes come in different colors therefore eliminating the need for the colored cellophane. I did not find colored tubes locally and was only able to find them online so I decided to try the colored cellophane.
Find a bright flashlight that will fit inside the tube, or can be easily modified to fit inside a tube. A flashlight that allows you to focus the beam can be helpful in getting the light to more evenly reach the other end of the tube as well. I used my strongest LED flashlight, unscrewed the housing around the light, and found a PVC adapter that fit both the end of the flashlight and the end of the tube nearly perfectly.

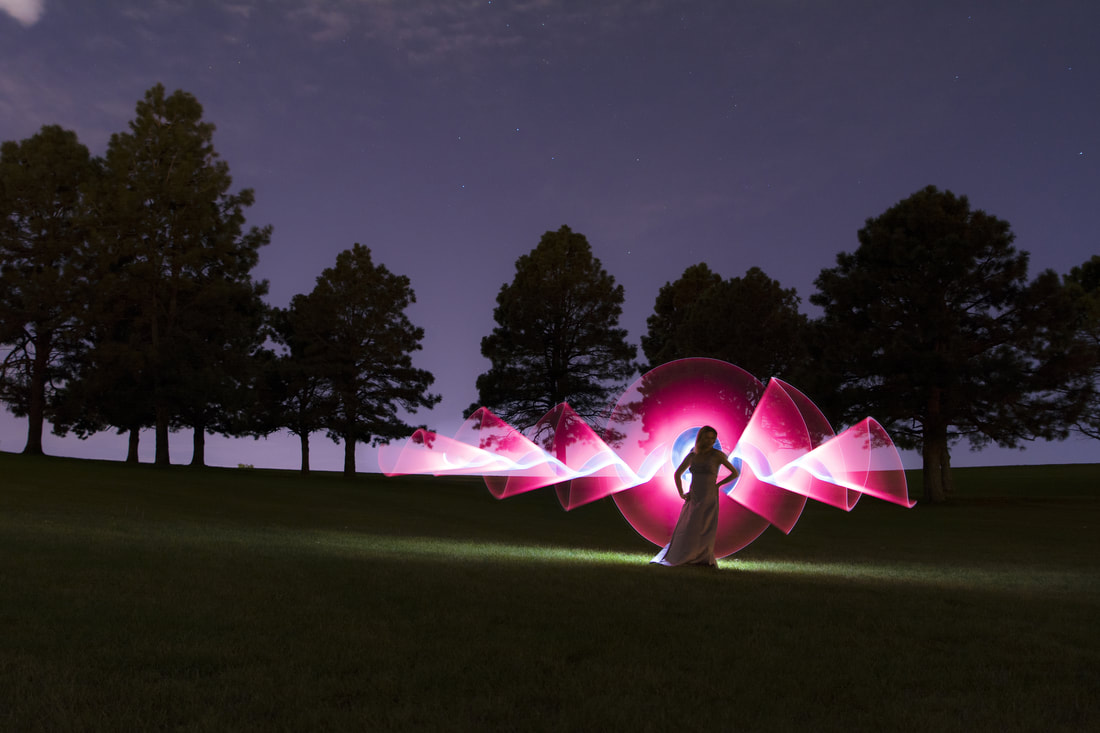
After having created the tubes and modifying my flashlight to fit inside the end of the tubes, I spent several nights trying to find the best camera settings for the effect I was after. This was probably the hardest part of the process. Each night of practice would yield different results given the different ambient light. It is impossible for me to advise anyone on the ‘correct’ settings as it drastically depends on so many different variables. For the most part I shot around f/5 or lower (wider) with ISOs anywhere from 100 to 500. Again, it really depends on the strength of the light from the flashlight, whether or not you want some detail in your model, the ambient light, etc.
I triggered the camera with a radio trigger. I do have an infrared trigger for my camera but it simply is not the best choice for this type of shoot. First, you will be relatively far from the camera and infrared triggers become less reliable the further away you are from the camera; much more so than radio triggers. Second, you need to be behind your model to prevent your body from being visible and infrared triggers require line-of-sight. If you do not own radio triggers for your camera, there are several options available and many of the cheaper ones work just as well as the more expensive ones.

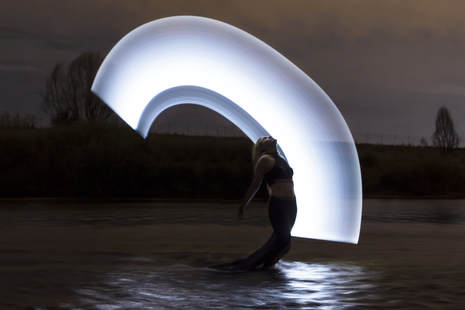
This also brings up the issue of hiding yourself from being exposed in the images. Have your model wear clothing that fans out and covers a lot of the area at and around the ground and the model’s feet. You should be directly behind the model. Any part of you that is not in constant motion will be visible. In other words, the dress acts as a cover for your legs and feet. Next, always wear black or darker colored clothing when light painting. Lastly, keep in motion. Anyone that has experimented with long exposure knows that static objects will appear and fast moving objects generally will not – or at least not as much as the static objects. That being said, make sure your model holds as still as possible during the exposure as you move around rather quickly.
I once asked a photographer friend to join me one night for shooting and he asked if we were just going to go out and ‘mess around with light’ (in a very ‘that’s kind of ridiculous’ tone) but light painting can yield some incredibly amazing results. Maybe it just wasn’t his thing but I love trying different light sources and methods for creating long exposure images. If you try this idea, I’d love to see your results and if you don’t get the results you were looking for the first few times, keep trying! My first few practice attempts were laughable (and I think I did actually laugh). Even the edited images from this shoot could benefit from some more attempts and refining the process. I believe there are no absolutely perfect images and that’s okay. The joy comes from the pursuit of trying to obtain them! As always, step outside of your comfort zone and give this a try!
And a HUGE THANK YOU to my wonderful model (and photographer herself), Alecia!
I have always had a fascination with light painting and photography. Some of the images I have seen online simply blow me away. Hopefully after reading this blog and watching the video, you too will be inspired to take a stab at this incredibly creative art form.
Light Painting with Steel Wool
Steel wool is cheap, can be found at just about any hardware store, and makes for some incredible light painting images. When purchasing steel wool, make sure you get steel wool with a very fine texture or grade. I get steel wool with a grade of #0000. Although you tend to get more sparks from this grade, experiment around with other grades as they can give you different effects. Find a metal container to hold the steel wool as it melts (burns) away. A metal whisk works out perfectly. I was lucky enough to find metal whisks with a metal loop at the end of the handle. Next, find something to attach to the whisk that will allow you to spin the whisk around. I used a short length of chain and a quick connector. Once you are set up and ready to go, take a pad of steel wool, fluff it out a bit, and place it inside of the whisk. Light the steel wool with a match, lighter, or even a 9 volt battery. After lighting the steel wool, swing it around. The faster you swing it, the further the sparks will fly! A friend of mine swung the steel wool while I manned the camera in the video and images. A word of caution: you are working with molten metal. Keep this in mind. Do this in an area where the risk of setting the surrounding area on fire is minimal. If using a model, be extremely cautious. These sparks can, and will, burn you! And as I learned on this shoot, it’s not a bad idea to have a fire extinguisher handy as well.
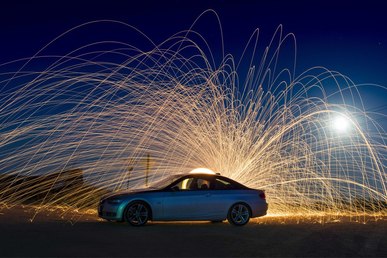
Camera settings. All you need is a camera that is capable of long exposures (with bulb mode if possible) and a steady tripod. In this case, we parked the car in front of a small puddle to get a reflection. My camera was set approximately 30 feet in front of the car. Since we did this shoot at night, I used a powerful flashlight to illuminate the model and car enough to be able to lock focus. Once I had focus locked, I switched to manual focus so that the camera did not hunt for focus before each shot (which it probably would have never found). I was using my Tamron 24-70mm on a crop sensor camera (D7100) closer to the 24 mm end of the lens. I set my ISO to its lowest, 100, and set my f-stop to f/9 but feel free to play around with your settings. We had a bright full moon out that night which provided additional light. I set my camera to bulb mode and began the exposure as soon as the sparks started to fly and ended the exposure as soon as they died off. Each shot was different but if I had to guess, the average shutter length was around 15 to 20 seconds long and bulb mode allowed me to start and stop exactly when I wanted.

The first couple of attempts were nice but the car remained in shadow, more or less. In an attempt to light up the front side of the vehicle facing the camera, I placed two flashes on the ground aimed at the model and vehicle. I set the flashes to rear curtain so they went off at the end of the exposure, that way, the person twirling the steel wool and the model knew exactly when the exposure was complete. Both flashes were set to ½ power. If I do a shoot like this again, I will put colored gels over the speed lights to get a better match in color on the car and model as compared to the sparks and the background color in general. I did adjust the hue and color balance on the car slightly in post, but getting it right in camera is always the better practice.
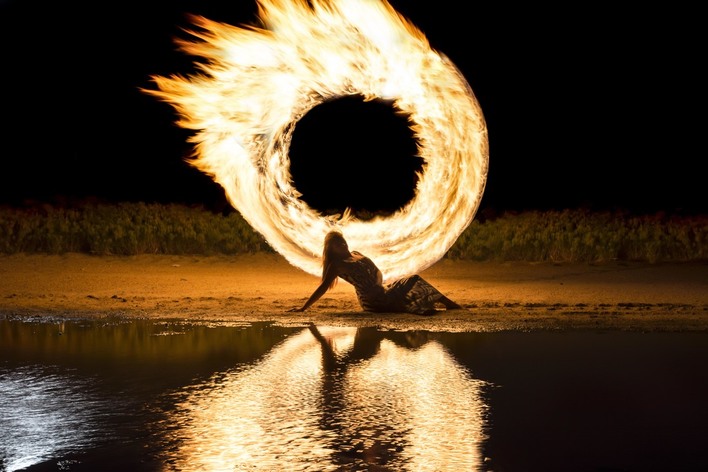
Light Painting with Fire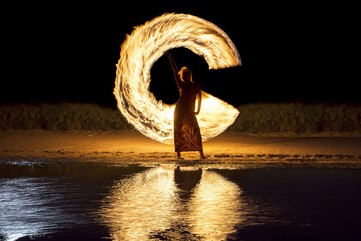
I got this idea from Zach Alan of Zach Alan Photography. The principle is very similar to the steel wool idea (or any light painting idea). You simply paint with fire behind your model. I used a ¾” wooden dowel that was 48” long. I then wrapped cotton around the top foot and a half of the dowel and secured the fabric in place with industrial staples. I also think wrapping the top portion of the dowel with natural fiber rope (like in my firewall tutorial) would work just as well. I then soaked the cotton in Coleman fuel (white gas) and lit on fire. We got decent light from the fire for about one minute then it started to slowly burn off and die out. Simply smother out the remaining fire with a damp towel and re-soak for more images. Make sure the fire and sparks are COMPLETELY out before pouring more gas on it. Since I was the individual light painting with the fire, I had my camera set to a two second exposure and had another individual trigger my camera. Some of the resulting images I had to edit and fix in post either because the camera stopped too soon or too late. In the future I think I will try triggering the shutter with radio triggers so I can precisely control when the camera starts and stops. I think this should be possible even while being the one light painting.
Camera settings – other than bulb mode, the settings were exactly the same. We did not use the flashes for the images with just the model.
Overall I am pleased with the results but would do things a little differently for both ideas should I revisit them in the future (which I most definitely will). Anyway, get out there and try some light painting with steel wool and fire, but be safe! No image is worth a visit by the local fire department or a trip to the emergency room! Well, most images, at least.
 I think when most people start off in photography, they tend to point their camera at simple everyday objects and that’s completely fine. Over time, some people become quite skilled at still life photography, landscape photography, wildlife photography, etc. For some, there comes a point when they consider the idea of pointing their camera at a person. Believe it or not, portrait photography can be very intimidating. For those of you out there that enjoy photography and have considered taking people pics but just haven’t, for a myriad of reasons, let me attempt to help you get past some common fears and stumbling blocks and hopefully get you engaged in the wonderful world of portrait photography! But I have to warn you, once you start, you’ll probably find it very addictive. Concern 1: I Don't Think I Will Be Able To Find Willing Models. Finding models is easier than most people think. For more ideas on cultivating a list of go-to models, head over to my other blog which has some great ideas for finding models. In short, start off simple. Ask family members and close friends. The more practice you can get with those you are comfortable with, the more that will help build up your confidence to start photographing friends of friends and complete strangers. If you’re anything like me, after a while you’ll simply start asking strangers if they have any interest in modeling for you. If you do it long enough and get your work out there, people will start contacting you for portraits. I now have a decent sized list of individuals I bug from time to time for my ideas. Just work on getting your first model! Concern 2: I Fear If I Ask Someone To Model For Me, They Might Say No.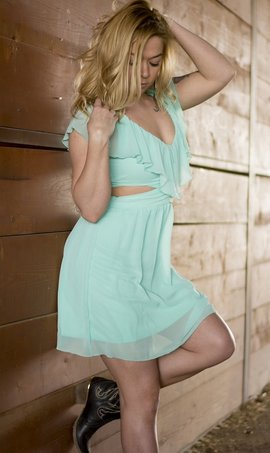 Some will, guaranteed! Or just plain ignore you. Don’t take this as a personal attack on you. Some people are so extremely nervous about being in front of a camera that the idea alone is enough for them to turn down any possibility of being photographed; even by a family member or friend. In fact, the more you get rejected, the less of a big deal it becomes. Simply move on and ask someone else. However, I think you’ll find most people are willing to be photographed. A little trick I found that works more often than not is to ask friends that tend to take and post a lot of selfies. If you’re lucky, you’ll find someone that loves being in front of the camera and is always willing to model for you. If you find someone like this, practice with them as much as you can. I was very fortunate to find a model that enjoyed modeling just as much as I liked photography and we did tons of ideas. Concern 3: I Fear If I Ask Someone To Model For Me, They Might Say Yes! As an introvert, this was truly my biggest fear. When you first start asking people to model for you, there can be a sense of relief when they say ‘no’. You’re simply back at square one and at least you can say you tried. But what do you do when you get that first ‘yes’ or two? Now the balls in your court again and it all falls back on you. That’s okay! If you’re just starting out, let them know that. Let them know you want to get some simple pictures of them in the park or some other setting that you think might make for some decent images. Research images online and find some ideas that appeal to you then try and see if you can duplicate the look. Don’t start out with some grandiose idea that will take hours to setup and shoot. Maybe have the first session be fairly brief, 15 minutes or so, or more if they are willing. Start simple. In all honesty, I still get nervous before each and every portrait shoot regardless if I’ve worked with the model before or not. It’s that adrenaline rush that can make this hobby addictive. Add to that getting one or two amazing images, and you’ll probably be hooked for life! Concern 4: I'm Afraid My Images Won't Be Any Good. No one is a pro the first go around. I look back now at some of my first portrait images and I cringe. The funny thing is, I thought a few of them were fairly decent back then. In all honesty, I still think the vast majority of my images are not good but that's okay. That's what keeps me picking up my camera. Like anything in life, practice makes perfect. The more you do it, the better you’ll get. If you’re expecting a stunning image that will go viral as soon as you post it, think again. Photography is a continuous learning process with no real ‘end goal’ – at least for me. Generally speaking, the image you take next should be better than the image you just took. Just keep shooting. Don’t get discouraged if the resulting images aren’t perfect but also don’t over criticize yourself either. We all tend to be our own worse critics so allow yourself some slack. You learn more from your failures than you do your successes. The images will get better over time as long as you continue to try, I guarantee! Nothing beats a failure but a try! Concern 5: I Have No Idea How To Pose A Model. Then don’t! Simply have the model sit or stand and do whatever comes naturally to them. If you have researched some ideas that you like, have a copy of the image on your phone or printed out and simply show them. They will see how the person is posed and will attempt to duplicate that for you. If you want to get better at posing your models, there are several online tutorials that cover that very topic. I tend to pose my models very little with most of my shoots. For the shoots where I desire a lot of very specific poses, I will either show the model an example or simply take the time to talk them through my idea. Most models will want to make sure you are getting the images you want so if they’re not quite in the right pose, work with them until they are in the right pose. Posing models takes practice. If you are not working with a professional model, telling someone to turn just a bit to their left will usually result in them turning way too much to their left. That’s okay. Simple tell them ‘that was too much’ or ‘turn back just a bit’. Don’t start out trying to pose your model too much. Unless that’s the look you’re after, some images look over-posed and can take away from what would otherwise have been a great image. Simple natural poses are a great place to start. You will also find that if you shoot with the same individual repeatedly, they will tend to become more comfortable in front of the camera and will start posing on their own. Run with it! Just like you, the more they practice it, the better they become as well. Concern 6: I Don't Have Expensive Portrait Equipment. Nonsense! All you need is a camera. Now you may find photographers out there yammering on and on about the best lenses and camera bodies for portrait photography but don’t believe for a second that you can’t get great images with a basic camera. Sure, some lenses may be better suited than others, but I have literally worn out my kit lens, one of the cheaper lenses in my manufacturer’s lineup, and have achieved some amazing images with it. I would challenge anyone to tell me which images came from my kit lens and which ones came from a more expensive ‘portrait’ lens. You don’t need expensive lights, stands, umbrellas, soft boxes, etc., to do great portrait photography either. The sun is your friend, especially at sunrise and sunset. There is a reason they are referred to as the golden hours. Even if you can only shoot midday under direct sunlight, find an area with decent shading. If you’re shooting inside, simply move your model to a window or to a few bright lights and that is generally enough to start getting great images. Lack of expensive equipment should NEVER prevent you from experimenting with photography, portraiture included. 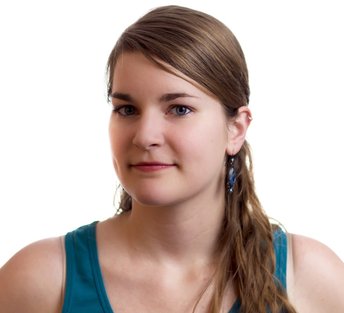 Most beginning photographers are intimidated by portrait photography. I was one of those photographers. It wasn’t until a dear friend challenged me that I decided I would give it a shot. The more portraits I take, the more I like taking them. And yes, I also do prefer more unconventional portrait shoot ideas that tend to take a little more work but I didn’t start out that way. I do not consider myself a portrait photographer any more than I consider myself an astrophotographer. I love all kinds of photography and I am rather proud that my portfolio is all over the place. If you’re a photographer that hasn’t done much portrait work but would like to, hopefully this information will help you take a step in the direction of at least giving it a chance. In addition to challenging yourself and stepping outside of your comfort zone, you will invariable meet and work with some amazing people that will touch you in ways you never could have anticipated. That, for me, is the true joy of portrait photography – the amazingly wonderful people I have met!
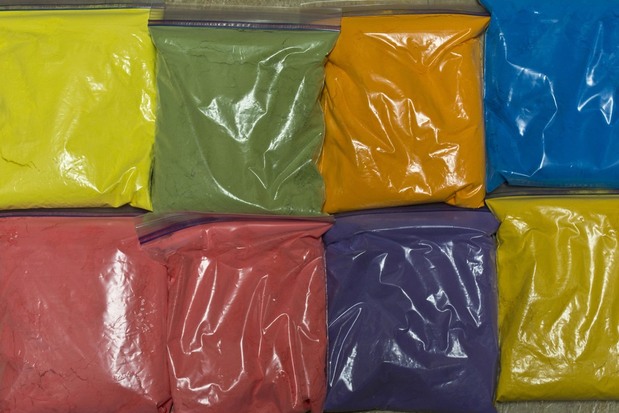
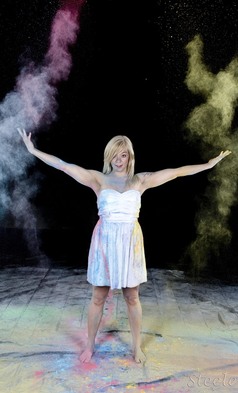
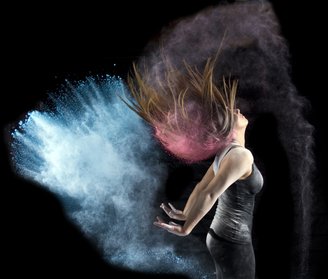
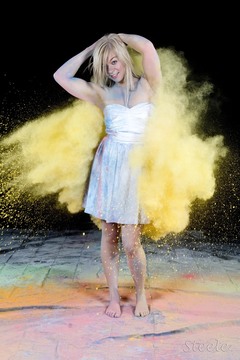
I have always loved brightly colored shoots that are unique and different. I’ve often wondered if my fascination with colorful shoots is tied in some way to my colorblindness. Anyway, I digress. When I first saw images of the Holi Spring Festival several years ago, I was blown away - so many bright and vivid colors. I researched images and found a few photographers that took the idea into the studio creating colorful powder/flour shoots with models. Obviously this idea was RIGHT UP MY ALLEY and I had to give it a shot. But where does one find colored powder in bulk for such a shoot?
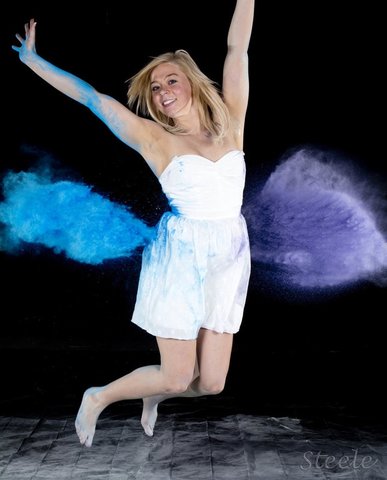
The easiest way to do a colored powder shoot is to illuminate plain white flour with colored gels covering off camera flashes. Another method is to color the powder first and just use a regular flash to illuminate the powder and subject. A cool side effect of coloring the powder is that the vibrant colors will be visible on skin and clothing, especially white clothing. You can purchase Holi powder online but it is not cheap and for a large shoot you would need quite a bit of it. The last time I checked, a five pound bag of a single color was around $24 dollars, so roughly $5 a pound. I wanted to find a cheaper way to produce colored powder in large quantities. More research led to several online tutorials and recipes for do-it-yourself colored powder or Holi powder. I tried a recipe that involves regular flour and coloring but found it didn’t produce nearly the texture you get when using cornstarch. Although flour is cheaper, the cornstarch recipe produces a better powder that is still cheaper than the online Holi powder. I have seen corn starch as low as $2 a pound. So how do you make it? Read on!

If you are going to do this for a shoot, start making the powder several days in advance, if not a week. First, buy some cheap cornstarch. It does not need to be a fancy name brand. Next, pour the cornstarch into a large bowl and slowly add water until you get oobleck. If you don’t know what this is, watch a video or two on this fun-to-play-with substance. Try not to add too much water because eventually you are going to dry the mixture out. Don’t fret, you cannot mess up by adding too much water, it will just require more time to dry. After you have the non-Newtonian mixture made, add color to it. You can use food coloring to color the mixture as much or as little as you wish. I personally use Wilton cake decorating colors because they tend to be more saturated and I have access to it for next to nothing. For photo shoots, I suggest more saturated colors overall so use more coloring than you think you’ll need but keep in mind this is completely a personal preference. When the powder is dispersed in the air, the color tends to appear less saturated simply because it is not as condensed. Put on some gloves and mix the color thoroughly into the mixture. It will take some time and effort as the substance is a little difficult to mix.
After you have the color you’re after, spread the mixture into a large shallow pan that allows the mixture to spread out as thin as possible. The thinner you can get it, the quicker it will dry out. On hot summer days, I simply leave the pan out in the sun until it dries. If the weather is bad or particularly humid, you can place the pan in an oven at a low temperature to dry it out as well. Periodically break up and crumble the mixture during the drying period. If you dry the mixture on a countertop or outside, it may take several days to completely dry depending on the size of your batch and the pan used for drying. If you find that the mixture clumps together when you attempt to periodically break it up, it is still too wet. After the mixture is completely dry, place small portions in a blender to further reduce the mixture into a fine powder. After you have your powder, bag it up in air tight (moisture proof) bags or containers until the shoot!
Please keep in mind that the color in the powder can stain! Make your model aware of this prior to the shoot so they can get appropriate clothing. Or as the photographer, purchase something for them to wear at a thrift store you don’t mind possibly ruining. As long as the model doesn’t get wet, or sweat too much, you can fairly easily blow the dust off of them. As soon as the powder gets wet, you do run the risk of it temporarily staining the skin or clothing. Frankly, we didn’t have that much of an issue with skin staining but it is something to consider. If at all possible, do the shoot outside or in an area you don’t mind getting powder all over the place. As you can image, cleanup can be a hassle. I have two powder shoots coming up, one with colored lights and one with colored powder. I will hopefully follow up with a tutorial on the actual shoots themselves discussing setup, camera settings, positioning of lighting, etc. Stay tuned!
|
SteeleKeep the interesting parts of life in focus. Archives
November 2020
Categories
All
|
 RSS Feed
