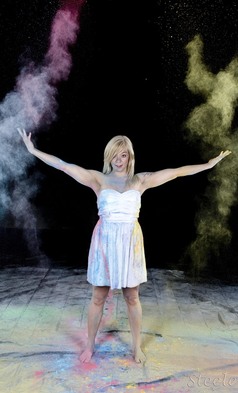
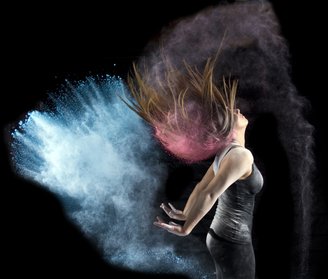
I have always loved brightly colored shoots that are unique and different. I’ve often wondered if my fascination with colorful shoots is tied in some way to my colorblindness. Anyway, I digress. When I first saw images of the Holi Spring Festival several years ago, I was blown away - so many bright and vivid colors. I researched images and found a few photographers that took the idea into the studio creating colorful powder/flour shoots with models. Obviously this idea was RIGHT UP MY ALLEY and I had to give it a shot. But where does one find colored powder in bulk for such a shoot?
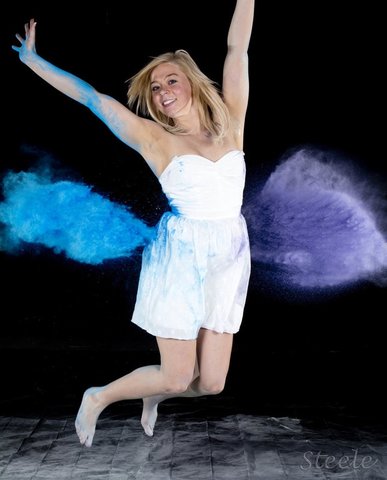
The easiest way to do a colored powder shoot is to illuminate plain white flour with colored gels covering off camera flashes. Another method is to color the powder first and just use a regular flash to illuminate the powder and subject. A cool side effect of coloring the powder is that the vibrant colors will be visible on skin and clothing, especially white clothing. You can purchase Holi powder online but it is not cheap and for a large shoot you would need quite a bit of it. The last time I checked, a five pound bag of a single color was around $24 dollars, so roughly $5 a pound. I wanted to find a cheaper way to produce colored powder in large quantities. More research led to several online tutorials and recipes for do-it-yourself colored powder or Holi powder. I tried a recipe that involves regular flour and coloring but found it didn’t produce nearly the texture you get when using cornstarch. Although flour is cheaper, the cornstarch recipe produces a better powder that is still cheaper than the online Holi powder. I have seen corn starch as low as $2 a pound. So how do you make it? Read on!
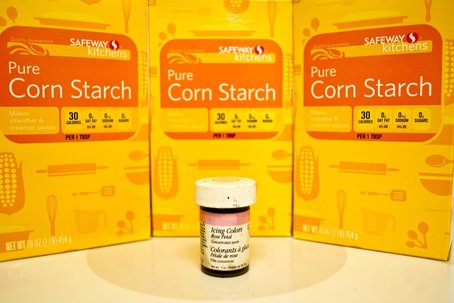
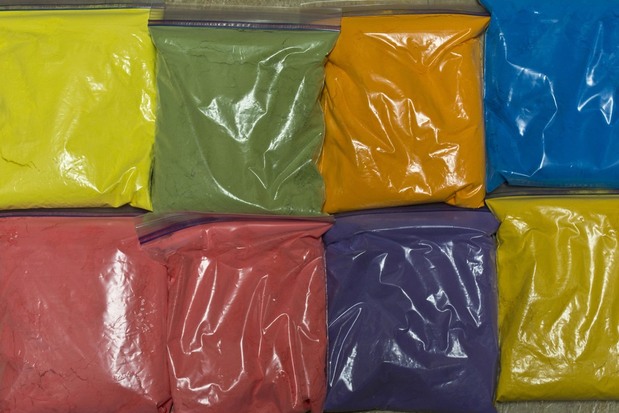
If you are going to do this for a shoot, start making the powder several days in advance, if not a week. First, buy some cheap cornstarch. It does not need to be a fancy name brand. Next, pour the cornstarch into a large bowl and slowly add water until you get oobleck. If you don’t know what this is, watch a video or two on this fun-to-play-with substance. Try not to add too much water because eventually you are going to dry the mixture out. Don’t fret, you cannot mess up by adding too much water, it will just require more time to dry. After you have the non-Newtonian mixture made, add color to it. You can use food coloring to color the mixture as much or as little as you wish. I personally use Wilton cake decorating colors because they tend to be more saturated and I have access to it for next to nothing. For photo shoots, I suggest more saturated colors overall so use more coloring than you think you’ll need but keep in mind this is completely a personal preference. When the powder is dispersed in the air, the color tends to appear less saturated simply because it is not as condensed. Put on some gloves and mix the color thoroughly into the mixture. It will take some time and effort as the substance is a little difficult to mix.
After you have the color you’re after, spread the mixture into a large shallow pan that allows the mixture to spread out as thin as possible. The thinner you can get it, the quicker it will dry out. On hot summer days, I simply leave the pan out in the sun until it dries. If the weather is bad or particularly humid, you can place the pan in an oven at a low temperature to dry it out as well. Periodically break up and crumble the mixture during the drying period. If you dry the mixture on a countertop or outside, it may take several days to completely dry depending on the size of your batch and the pan used for drying. If you find that the mixture clumps together when you attempt to periodically break it up, it is still too wet. After the mixture is completely dry, place small portions in a blender to further reduce the mixture into a fine powder. After you have your powder, bag it up in air tight (moisture proof) bags or containers until the shoot!
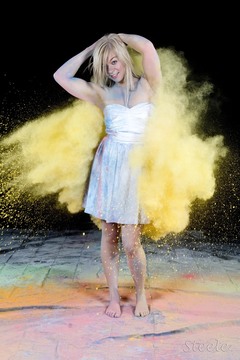
Please keep in mind that the color in the powder can stain! Make your model aware of this prior to the shoot so they can get appropriate clothing. Or as the photographer, purchase something for them to wear at a thrift store you don’t mind possibly ruining. As long as the model doesn’t get wet, or sweat too much, you can fairly easily blow the dust off of them. As soon as the powder gets wet, you do run the risk of it temporarily staining the skin or clothing. Frankly, we didn’t have that much of an issue with skin staining but it is something to consider. If at all possible, do the shoot outside or in an area you don’t mind getting powder all over the place. As you can image, cleanup can be a hassle. I have two powder shoots coming up, one with colored lights and one with colored powder. I will hopefully follow up with a tutorial on the actual shoots themselves discussing setup, camera settings, positioning of lighting, etc. Stay tuned!
0 Comments
Leave a Reply. |
SteeleKeep the interesting parts of life in focus. Archives
November 2020
Categories
All
|
 RSS Feed
