|
For months and months I kept seeing other photographers and models working with colored smoke. Seeing how I love colorful shoots (even though I am color blind), I had to give it a try.
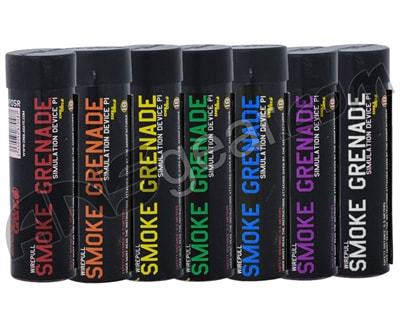
I researched colored smoke and found an online store that ships colorful smoke grenades typically used for paintball games. Check out Ansgear to see their collection. They have several different sizes, varieties, and colors of smoke grenades. The grenades I settled on were wire pull basic grenades. I started collecting colors over a few months..
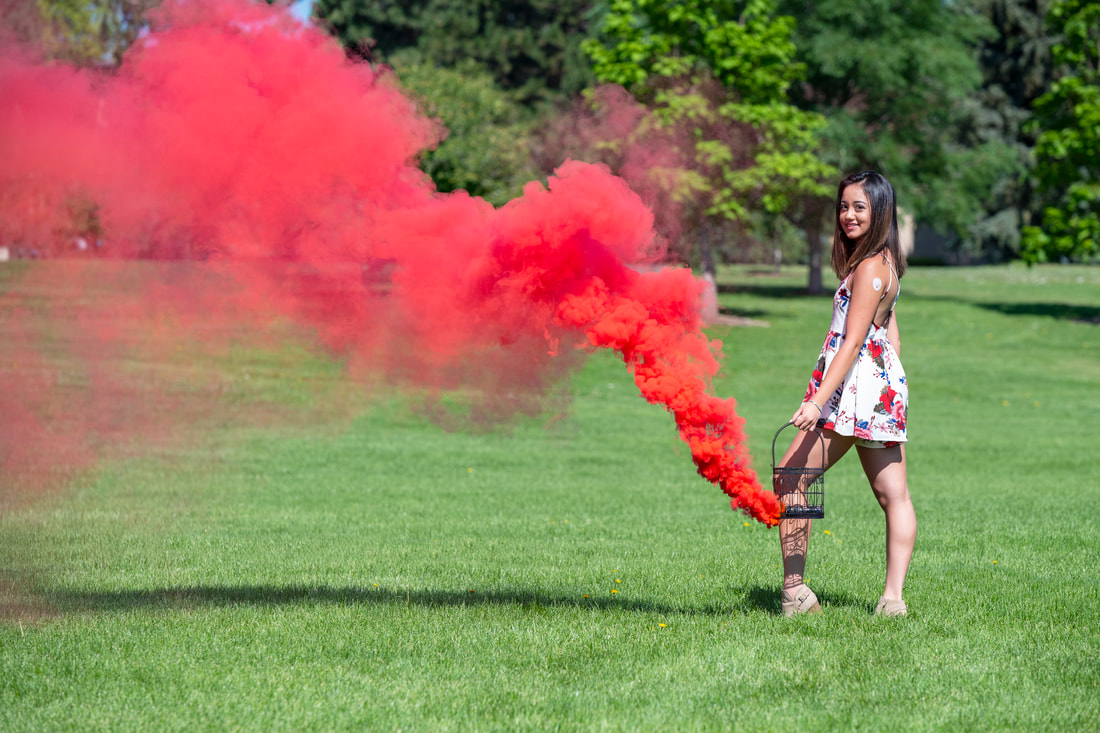
I knew I wanted to use several different models in several different outdoor locations for the images as well as a video so I reached out to several different models and started lining up shoots. I experimented with a grenade to see how much smoke it would produce, for how long it would produce it, and how hot the grenade would get (just to see if they could be safely handheld). The amount of smoke is nothing short of amazing. You can easily get close to 45 seconds of really good smoke with each grenade. And although they didn’t get extremely hot, I still decided to find another method for the models to hold them. Wife to the rescue! She found a decorative wire enclosure that worked great. Simply start the grenade, drop it in the basket, and swing the basket around.
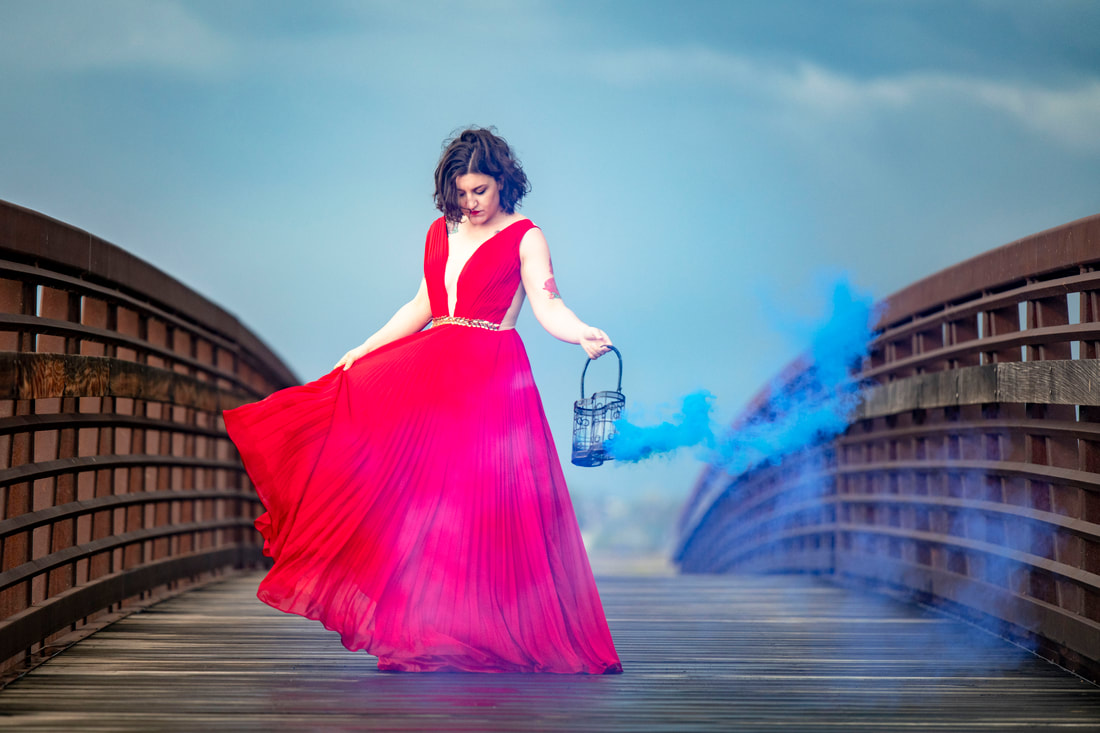
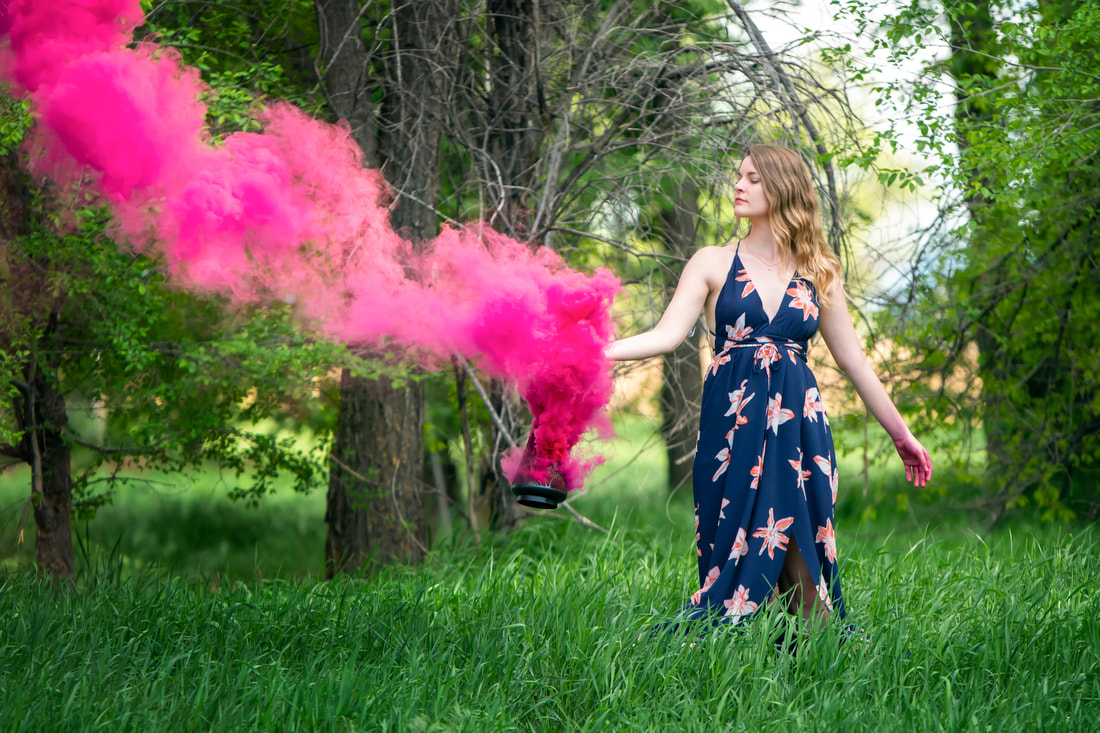
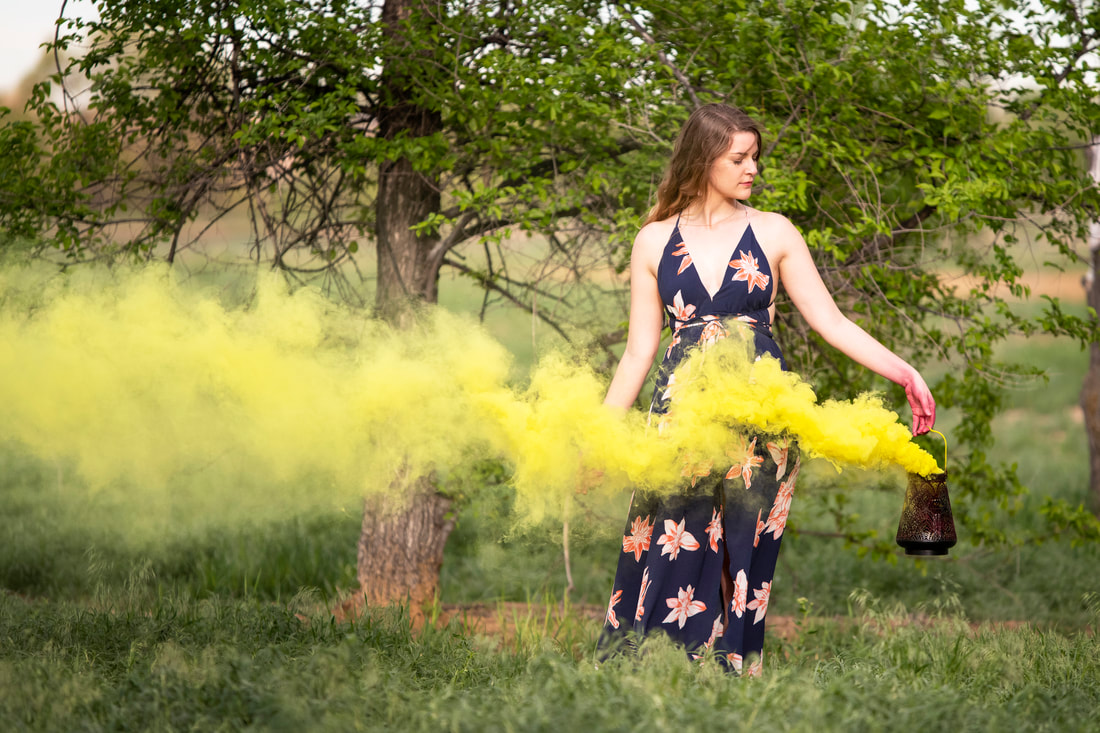
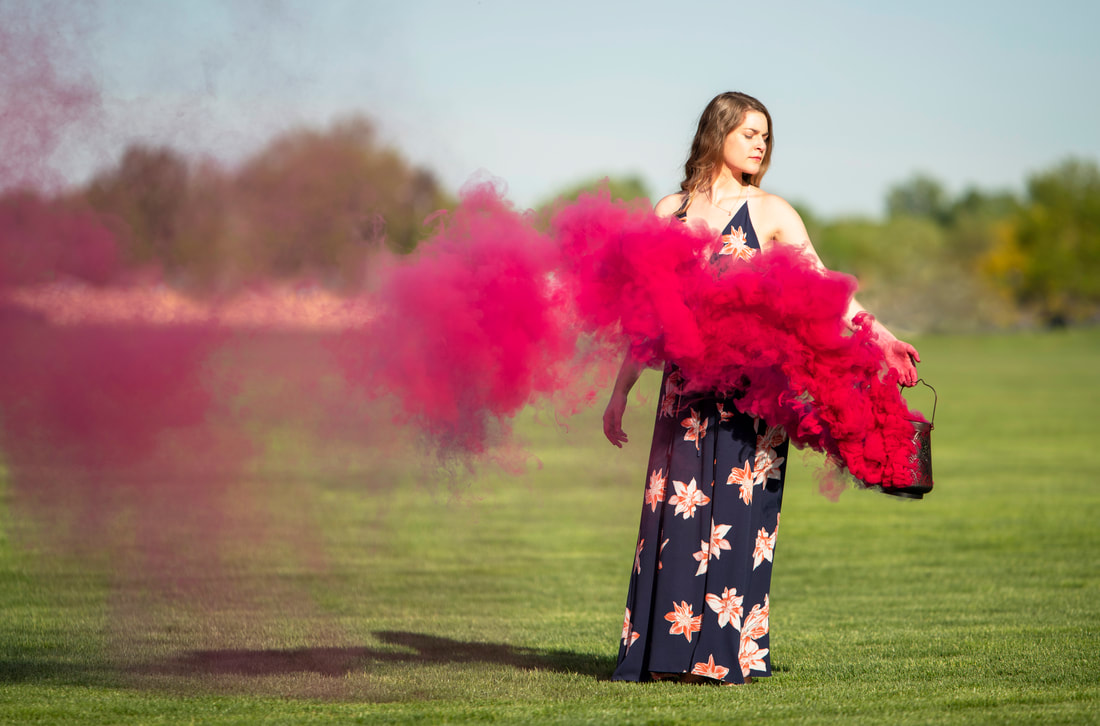
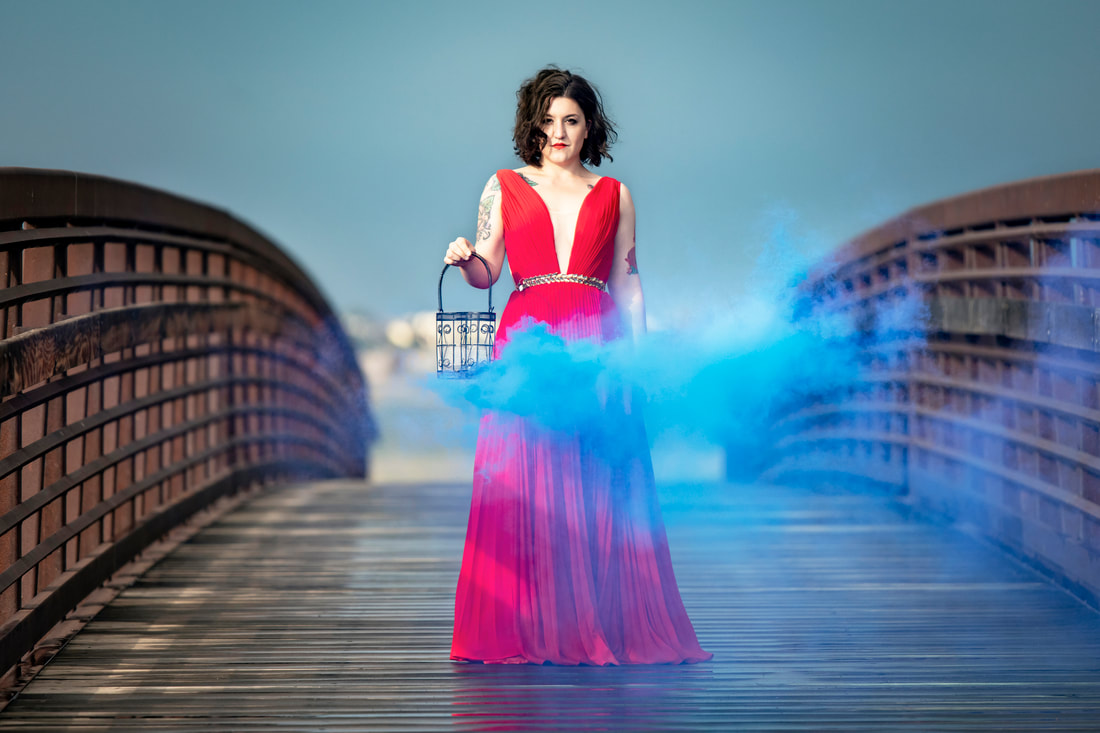
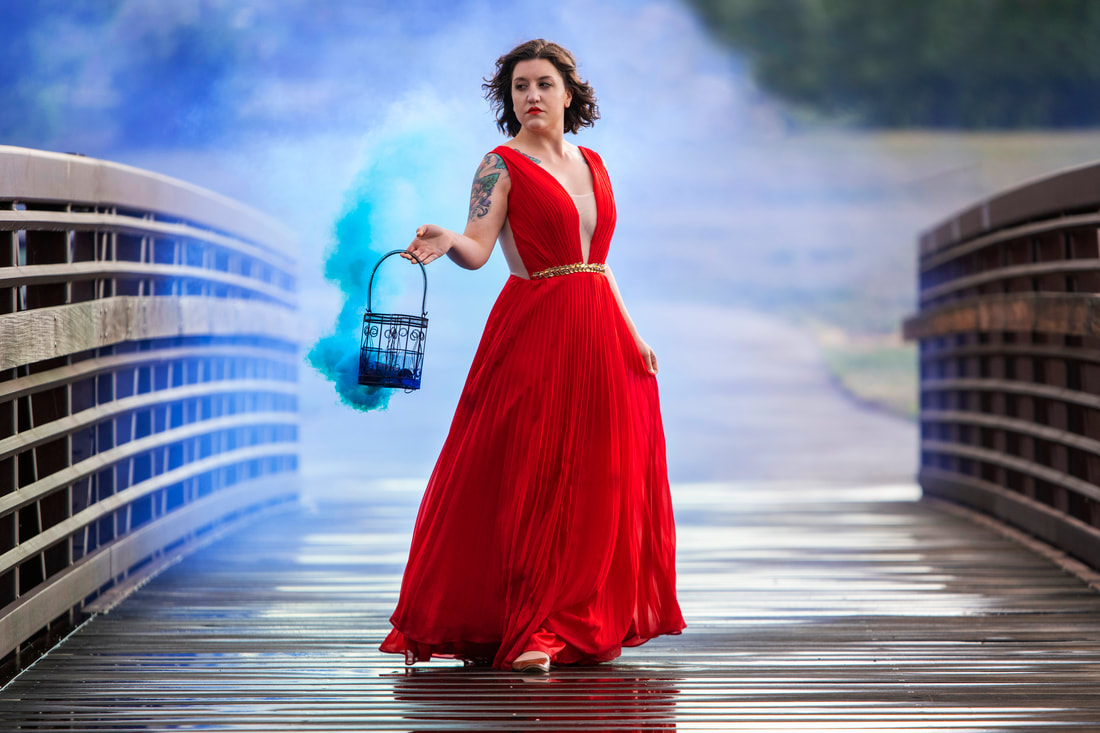
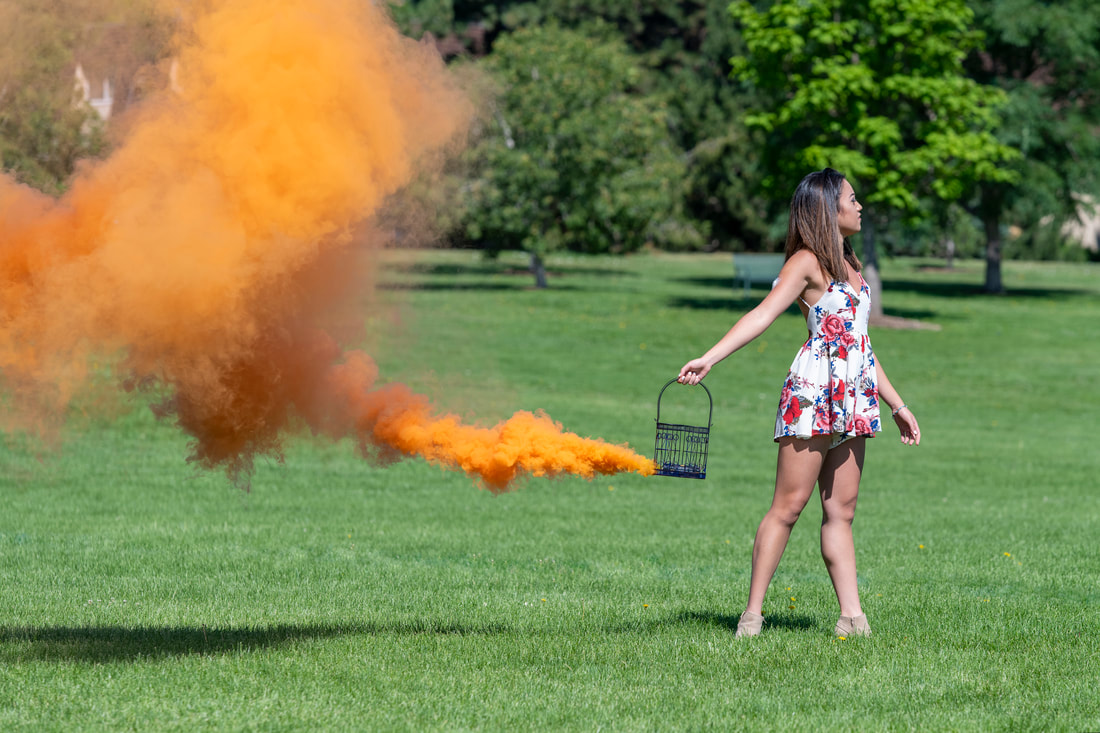
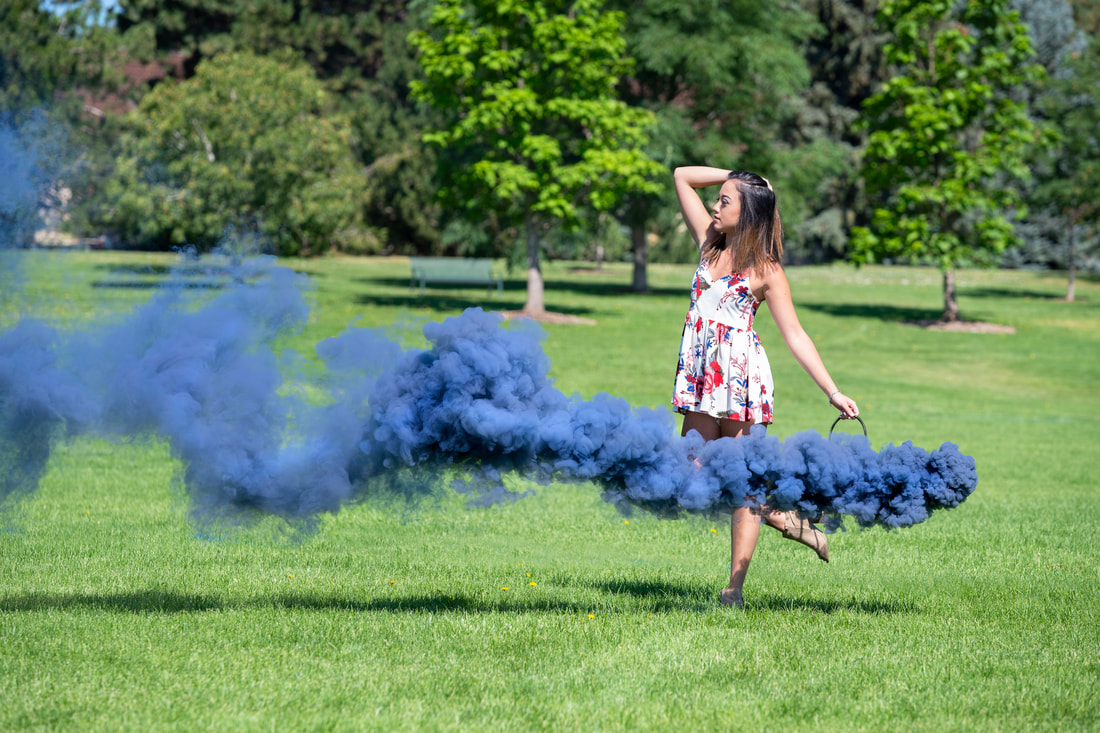
Each model found amazing outfits to match or compliment their smoke colors and the shoots began. Since I knew I wanted to make a video related to the shoots, I employed my 8 year old daughter to man the video camera (cell phone). By the way, she is so excited her name is listed in the credits on the YouTube video. She’s curious as to how many ‘describers’ (subscribers) she has now!
I love several of the images we got from the shoots and the video is one of my personal favorites (despite the fact it is one of my most disliked videos to date – go figure). I am now on the hunt for more ideas that involve colored smoke. Thanks to the awesome models, my wife, and my daughter for helping me with this several month long project.
0 Comments
Flour – it’s good for more than just baked goods. I have done flour/powder shoots about four or five times now and they are still just as challenging and interesting as the first time I tried them. And no, I do not tire of doing the same type of shoot more than once. I learn something new every time. For this particular shoot, I enlisted the help of a competitive dancer, Sasha. I have worked with Sasha on a couple of other shoots before and I knew she would be perfect for this idea. 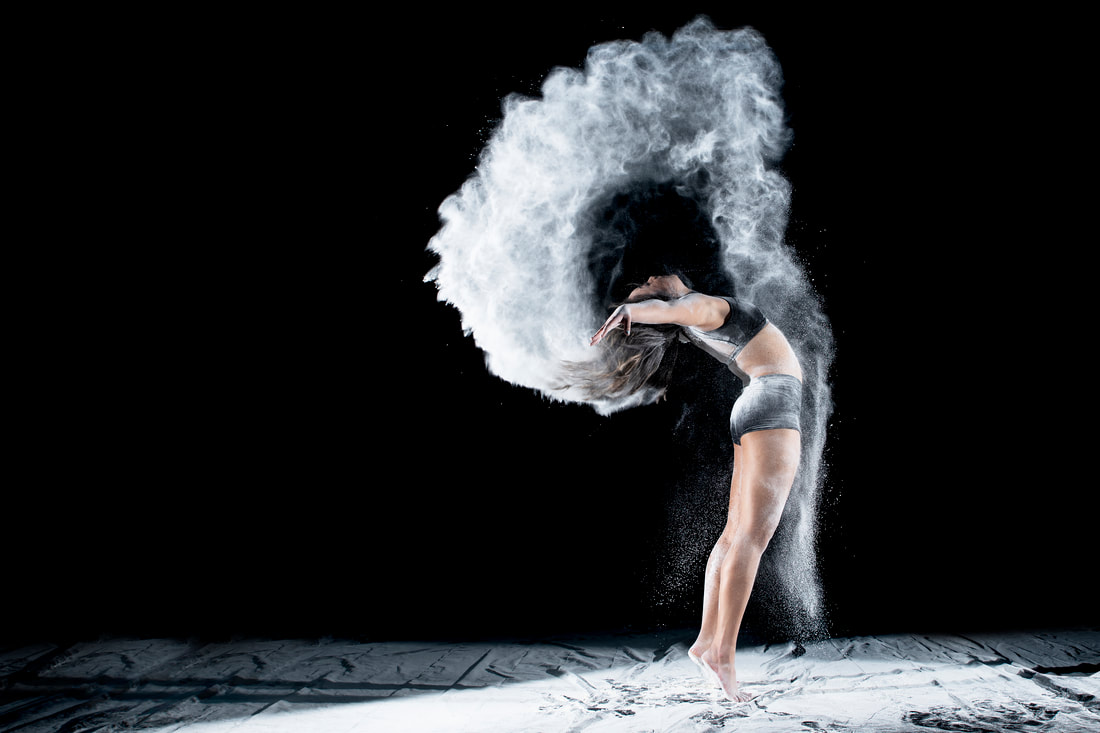  This shoot can be done in a large studio but cleanup will be an undertaking. Doing the shoot outside helps alleviate some of the cleanup. I find the best background for these types of shoots is a black background. I buy packages of black plastic sheeting that is 10 feet by 25 feet for about $10. I buy two and tape them together with black tape giving me a single piece that is 20 feet by 25 feet. I then hang the sheet from the eves of a two car garage roughly 10 feet high - the rest of the plastic drapes down the driveway. 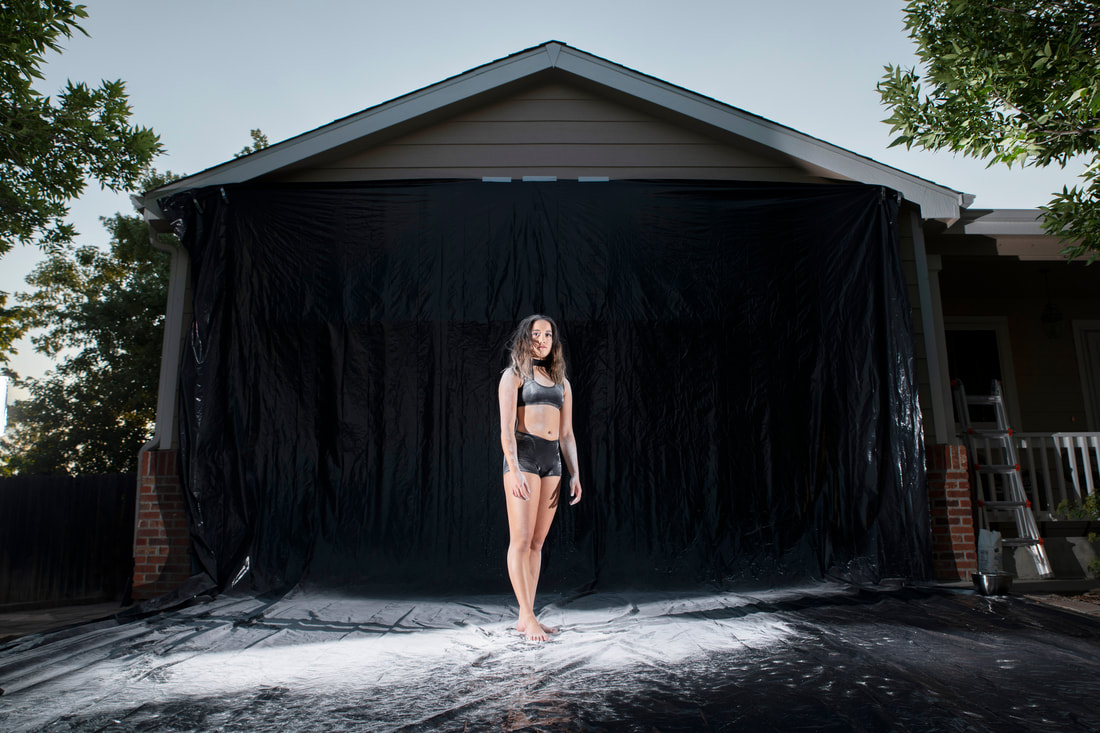 I then place two flashes on either side of the driveway with flags (barn doors) on the side of the flash facing the plastic hanging over the garage door. Each light is placed slightly in front of the plane of the model aimed slightly back towards the model. The intent is to illuminate the model while at the same time avoiding light from spilling on the background. Despite many online tutorials, I find I get much better results illuminating the flour from the front rather than from behind. However, that just may be my personal preference. I then mark a spot on the ground about 6 to 10 feet from the background and obtain focus with the model standing on that spot. After that, I select a relatively wide depth of field (focus) around f/7 and switch the camera to manual focus. The camera remains on a tripod throughout the shoot and is triggered remotely for each image. After that, it is all a matter of timing. Some of the images were shot throwing flour on the model and other images were shot with flour simply flying off the model. Obviously the images where flour is tossed on the model take more timing accuracy but after a few attempts, you find the sweet spot. 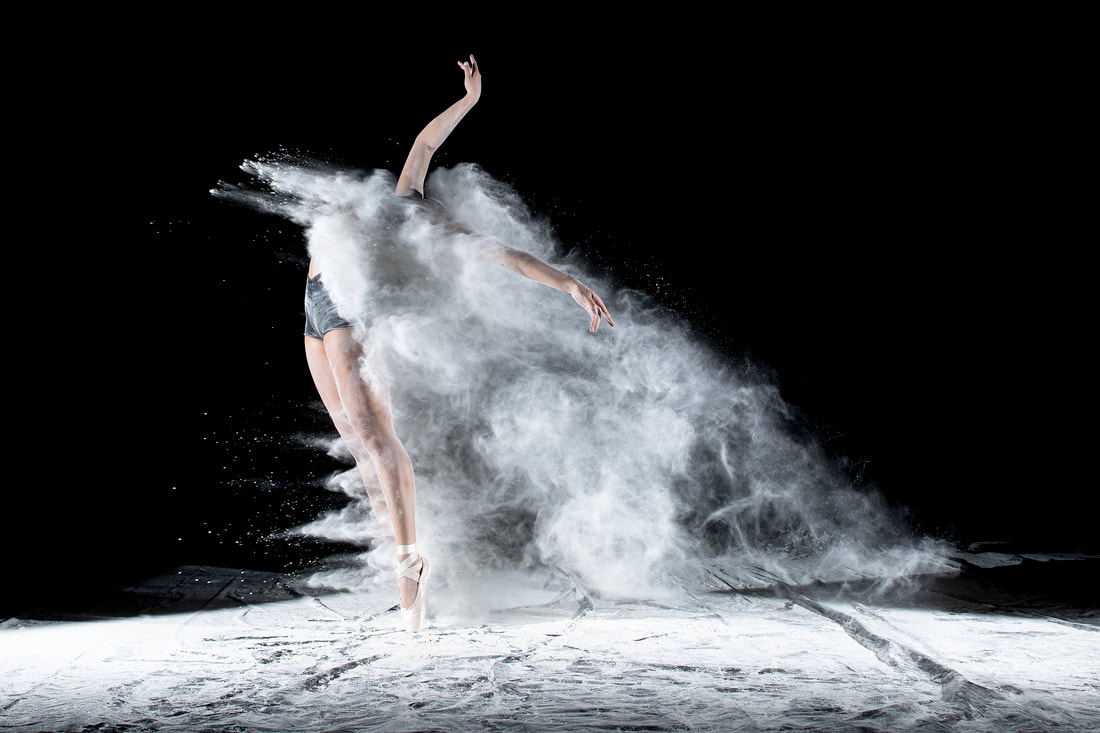 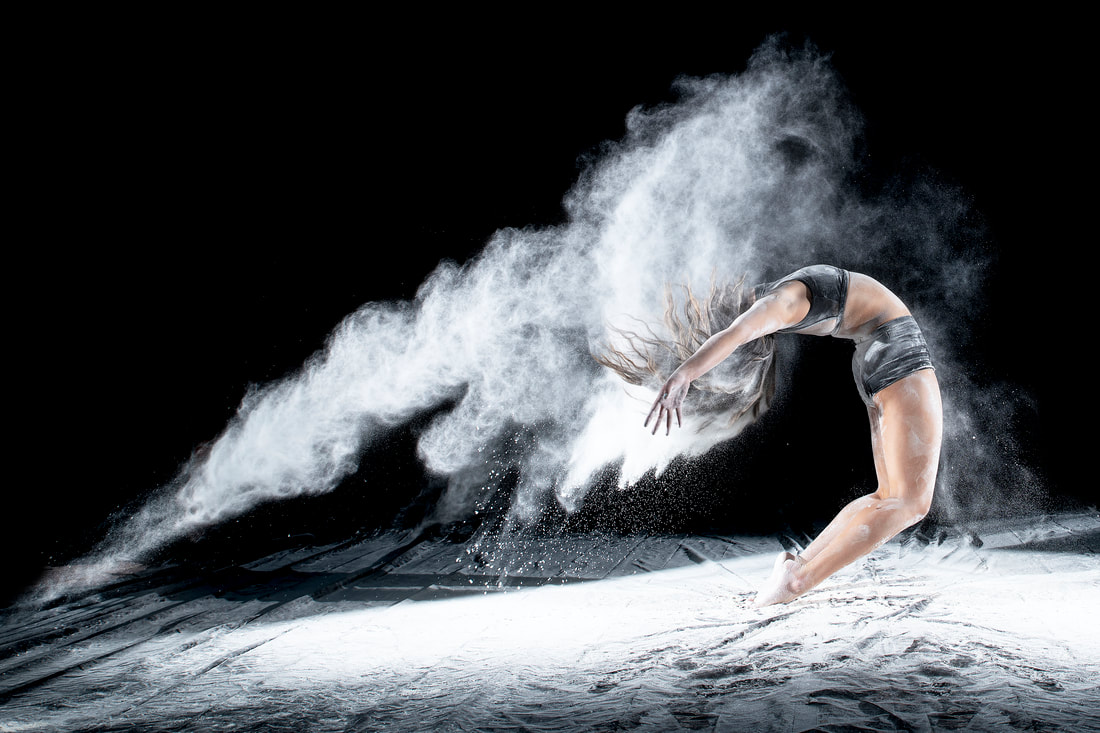 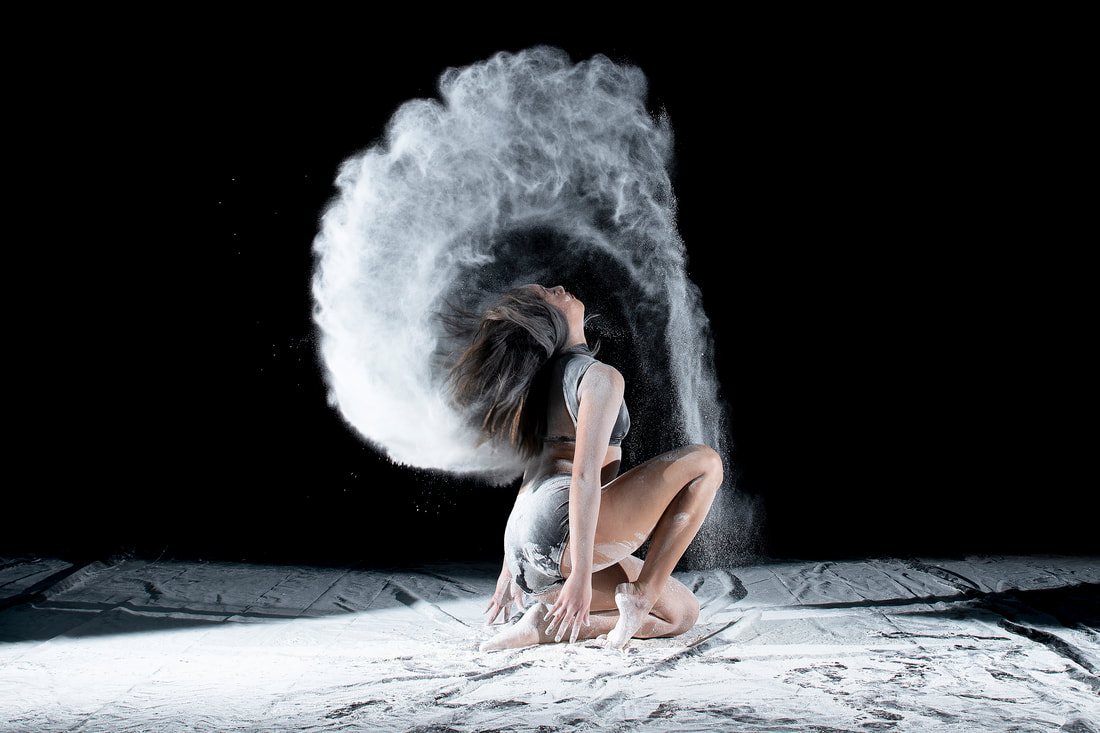 For this shoot, we also employed the use of a trampoline. Flour is placed on the surface of the trampoline and the model simply bounces on the trampoline. Setup is exactly the same. A black tarp hung behind the trampoline with two flashes on either side of the model slightly ahead of the model aimed slightly behind the model. When editing the images, I will darken the blacks and lighten the whites, or you can adjust contrast to your liking. 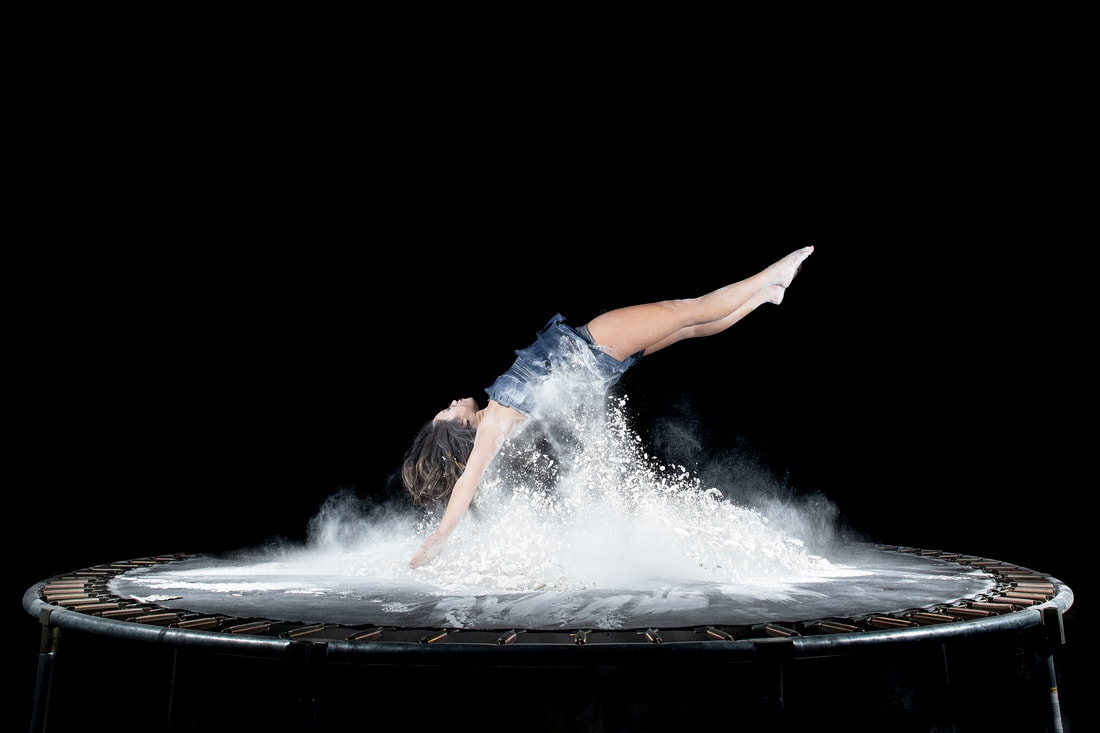 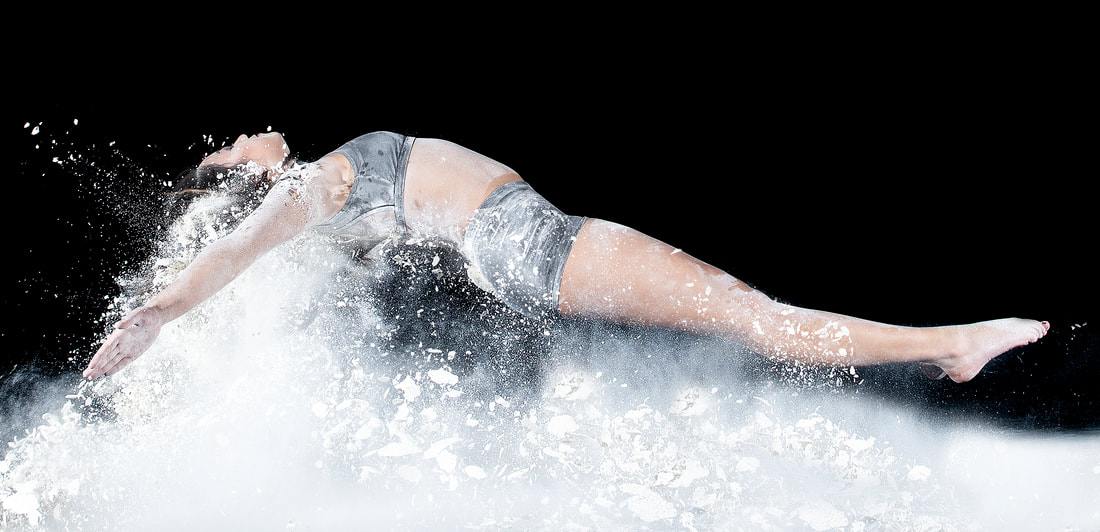 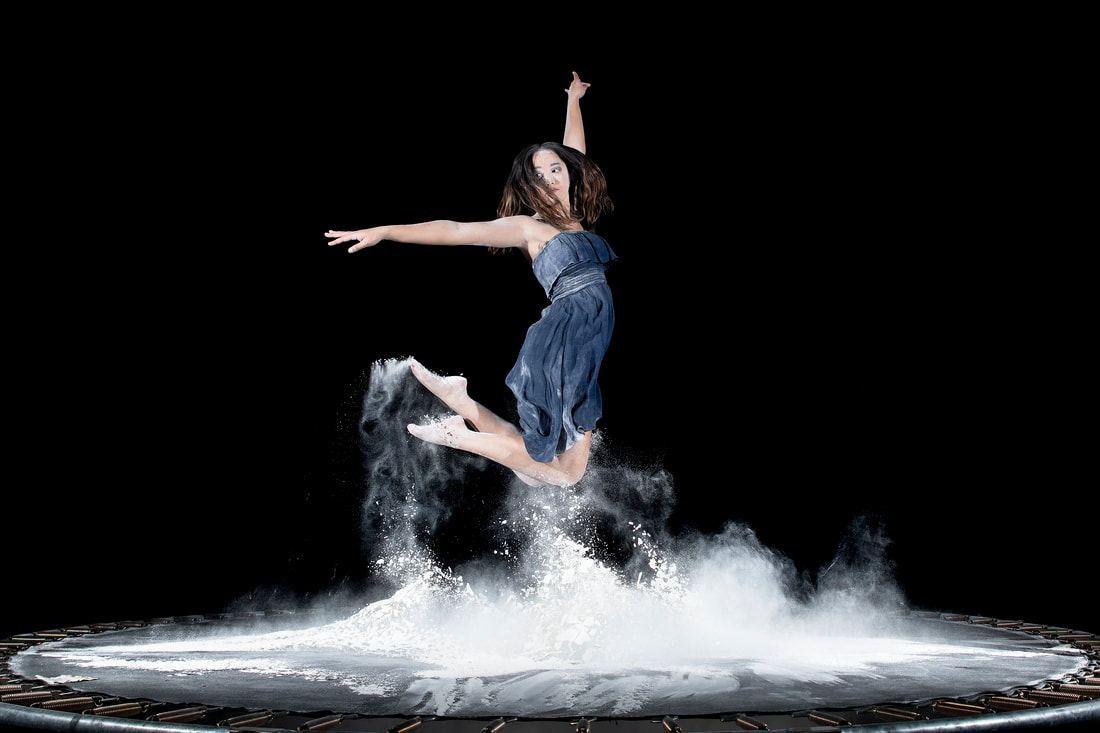 After the shoot, you sweep all of the flour to the edge of the plastic and into a bucket or other container. The plastic can then be cleaned off, folded up, and re-used for another shoot. Any fine powder that gets in the air as a result of the shoot typically blows away in the wind. If you were in a studio however, it would eventually settle down on everything in the room requiring additional cleaning. Do it outdoors if you can on a night that isn’t windy and rain is not expected. 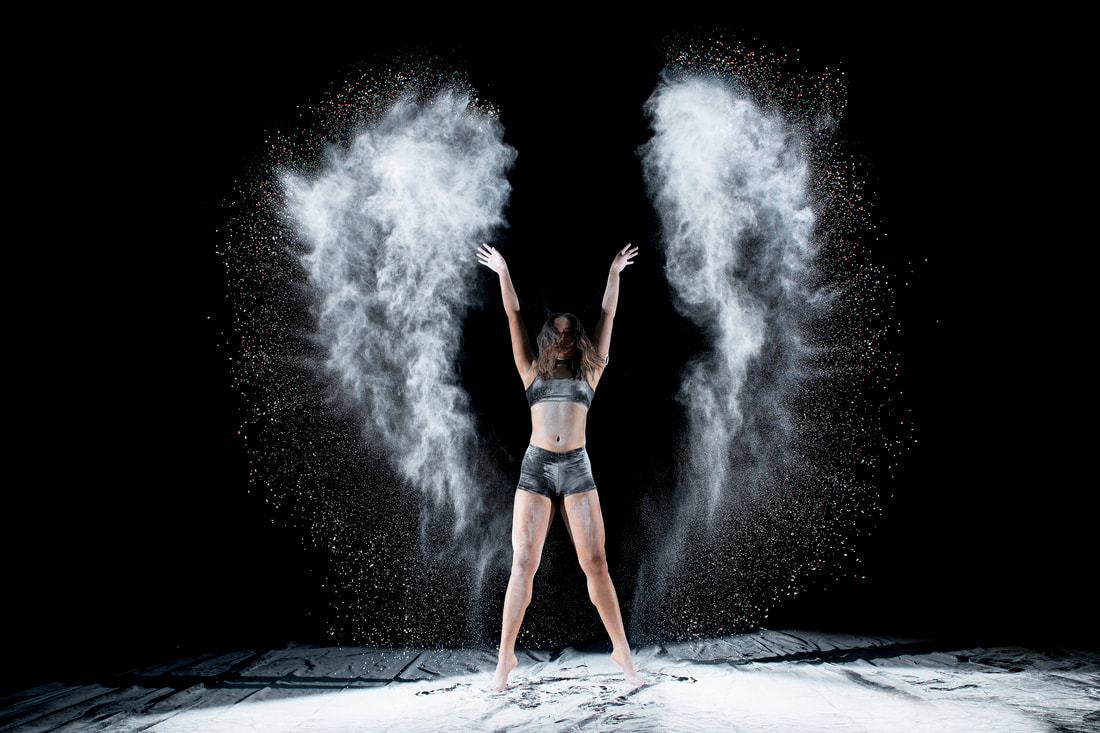  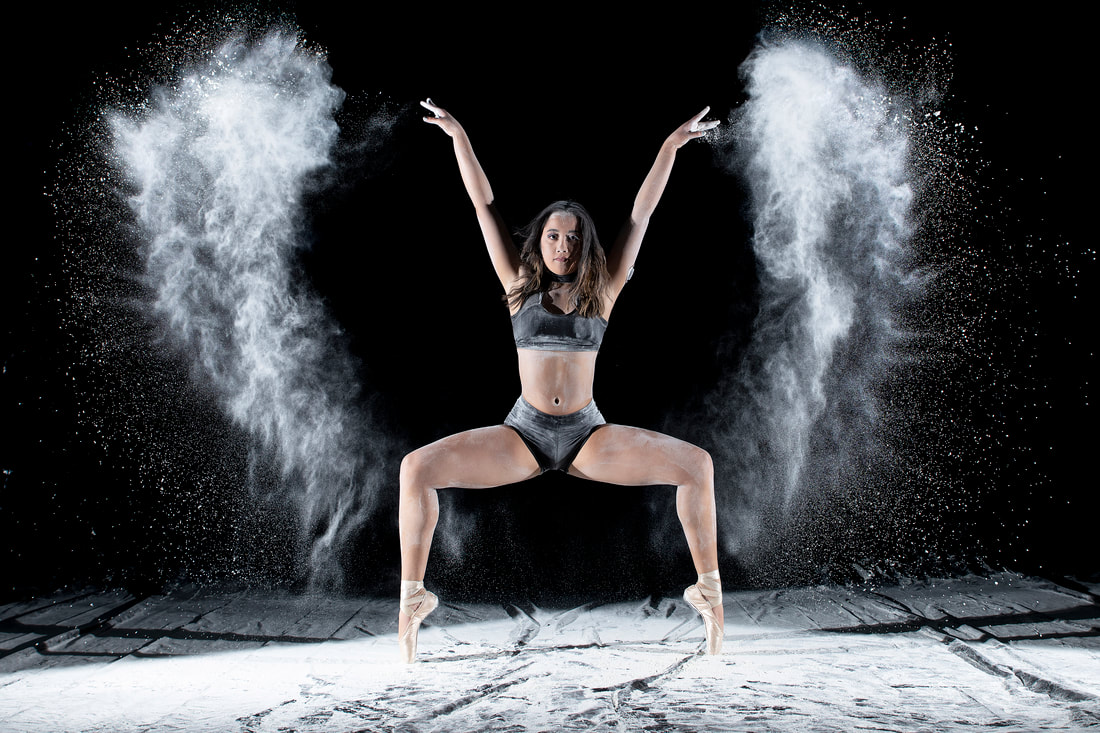 I love these messy and crazy shoots and highly recommend everyone try it at least once. Go buy a bunch of flour, some plastic sheets, and find a model that isn’t afraid to get a little messy. And don’t forget to have fun in the process.
|
SteeleKeep the interesting parts of life in focus. Archives
November 2020
Categories
All
|
 RSS Feed
